
How to create Channel Groups
Channel Groups Defined
The Channel Groups feature works more as a customisable filter to see data from channels you want to see. Let's say your eCommerce business has operations across multiple countries, including Singapore, Malaysia, Indonesia. You can create a Channel group for Indonesia alone that contains all your channels, that is- Shopee, Lazada. Shopify, Facebook and Google.
You can then go to Workspace and select this channel group and only see data from Indonesia stores and marketing channels.
Geographical use case is one, another can be, you have multiple brands under your business so you can create brand wise channel groups.
Here’s how you can get to the Connect Groups feature:
Click on Connect > Connect Groups
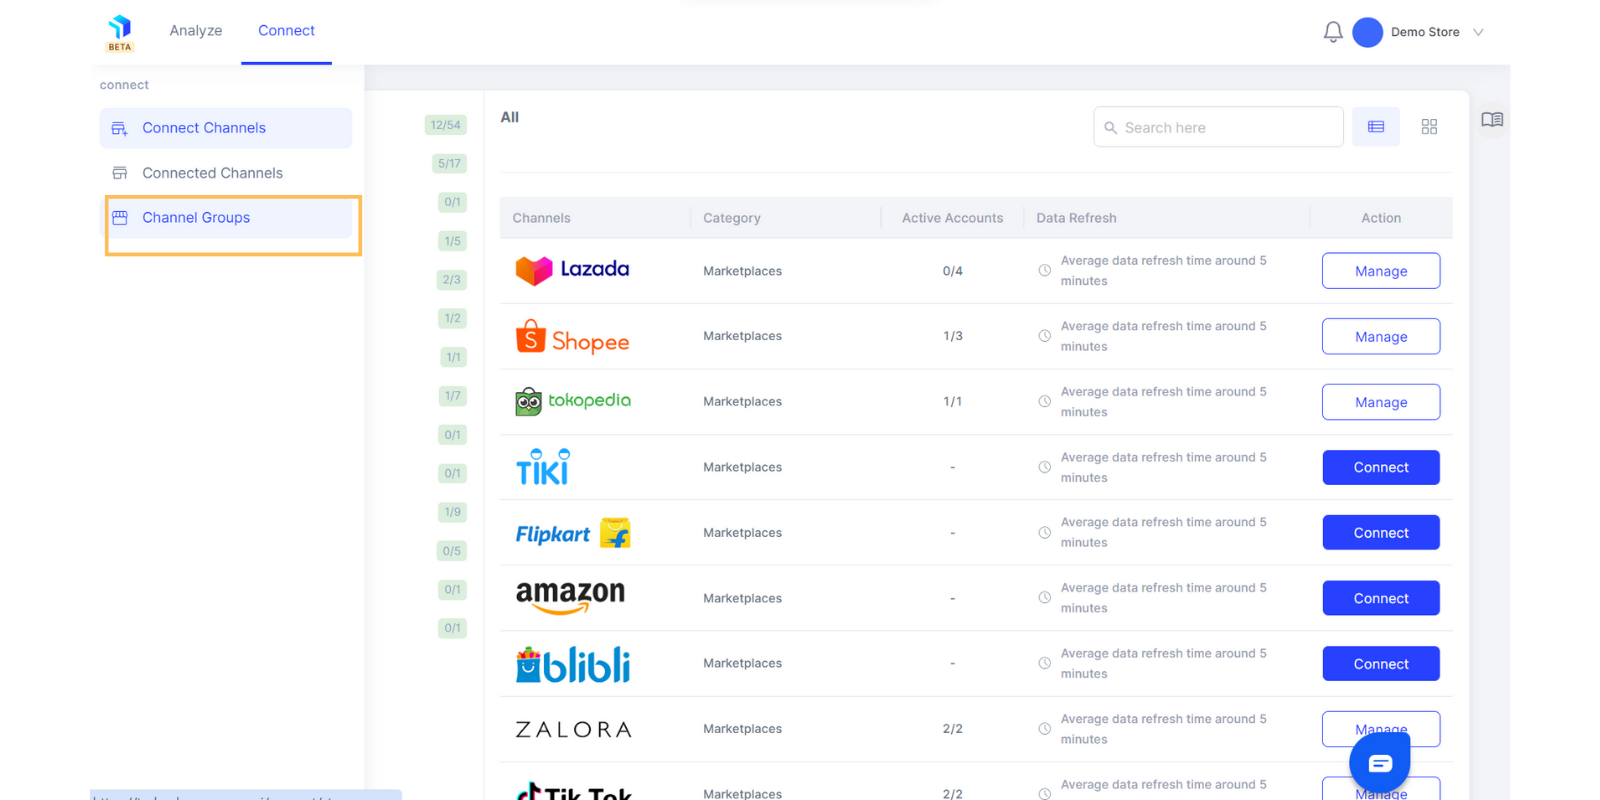
- Navigate to the Channel Groups feature under the Connect tab.
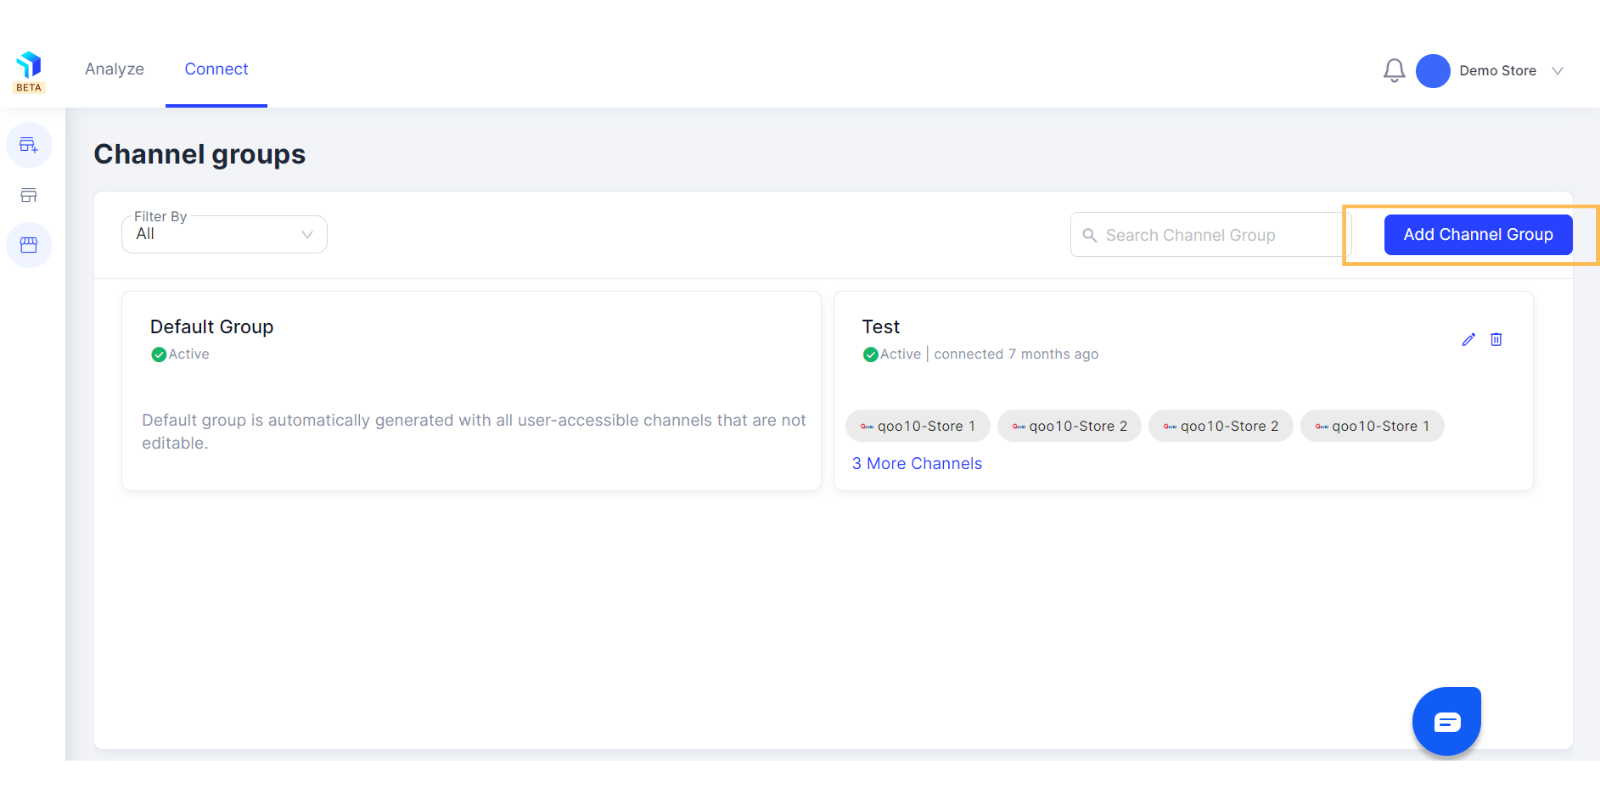
2. Click on the Add Channel Group button on the top left. There is a default group automatically generated with your connected channels.
3. Enter the name of the New Channel Group for better reference.
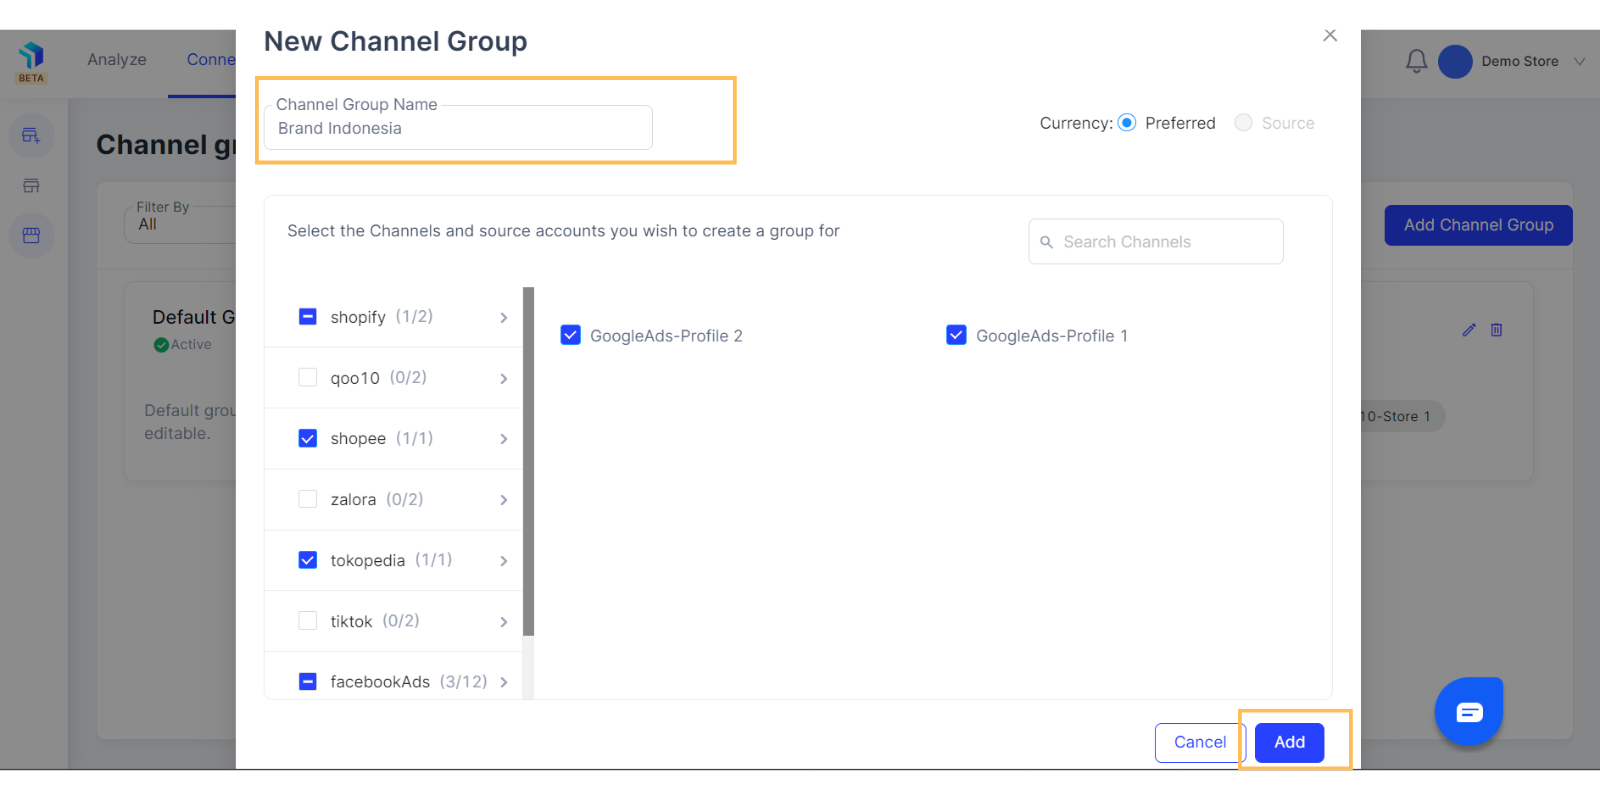
4. Select the Channels and Source Accounts you want to create a group for. Pick the ones you want to add to make the group.
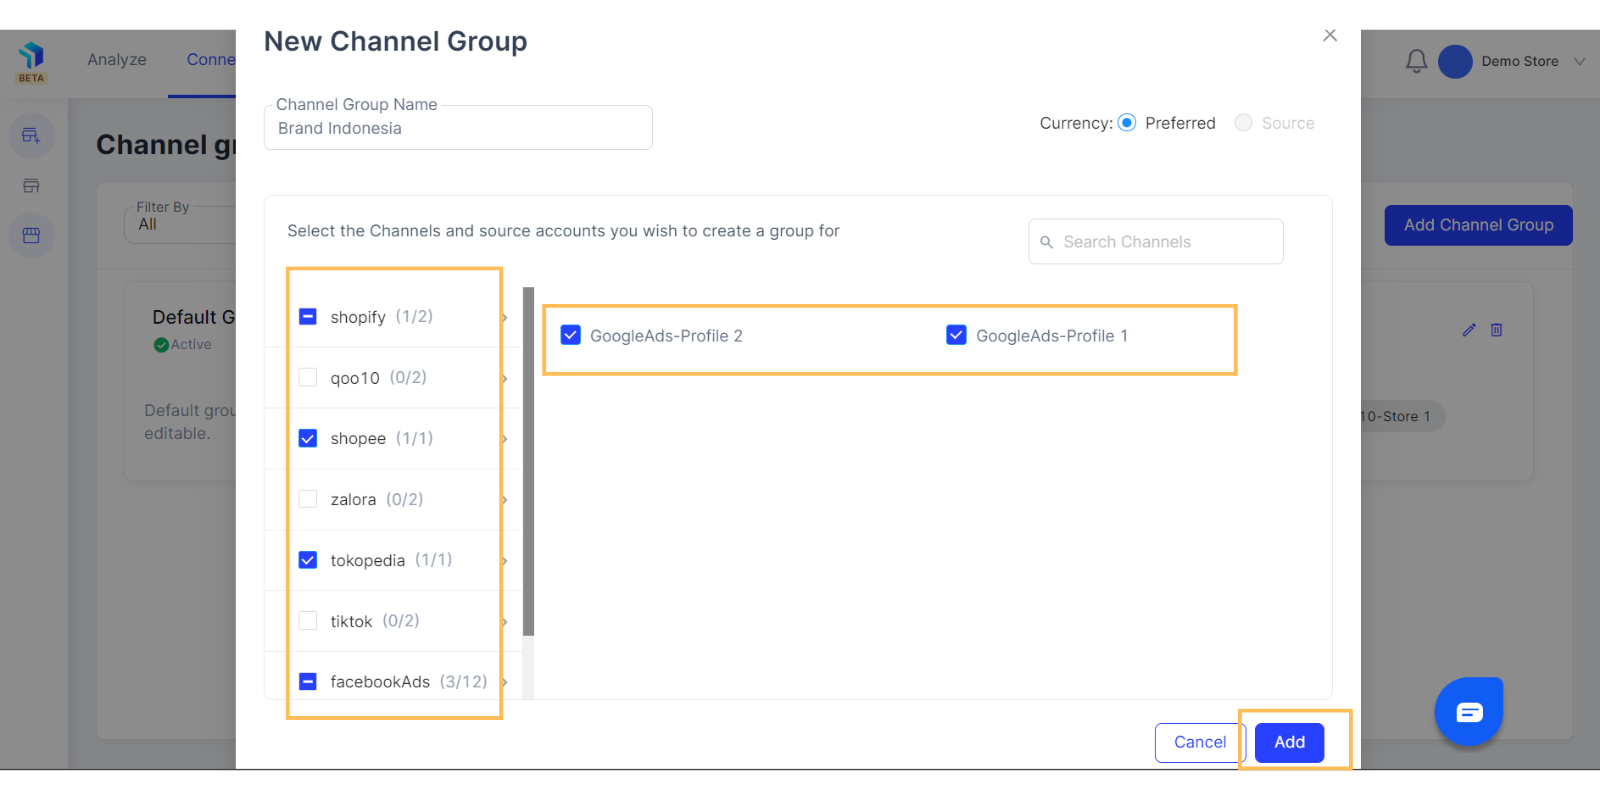
5. Use the search functionality, if required, to look for the source/channel account you are looking to add.
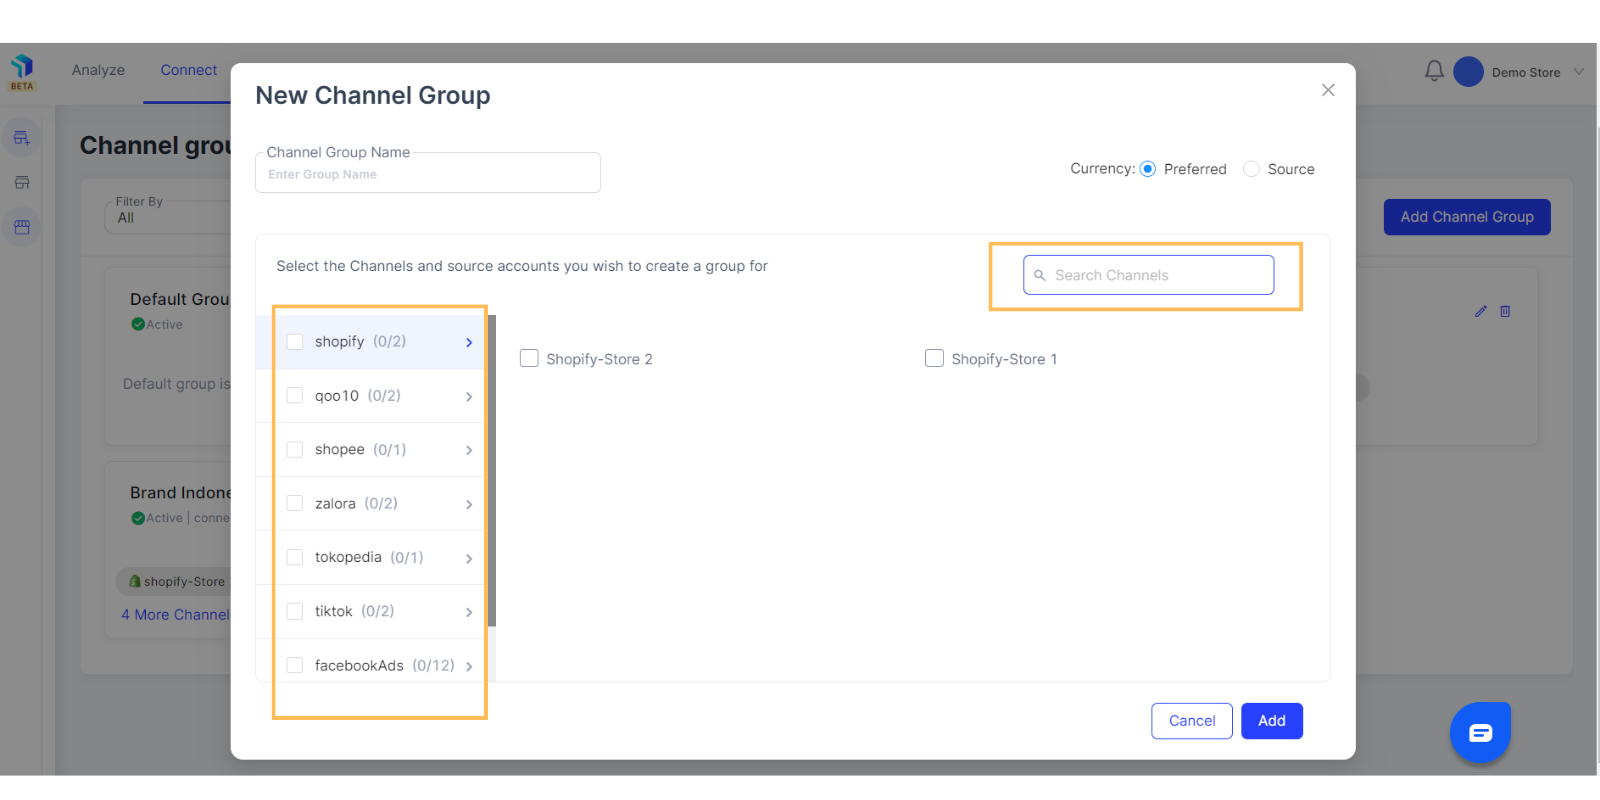
6. Once you click on the Add button, you will see the newly created Channel Group on the page.
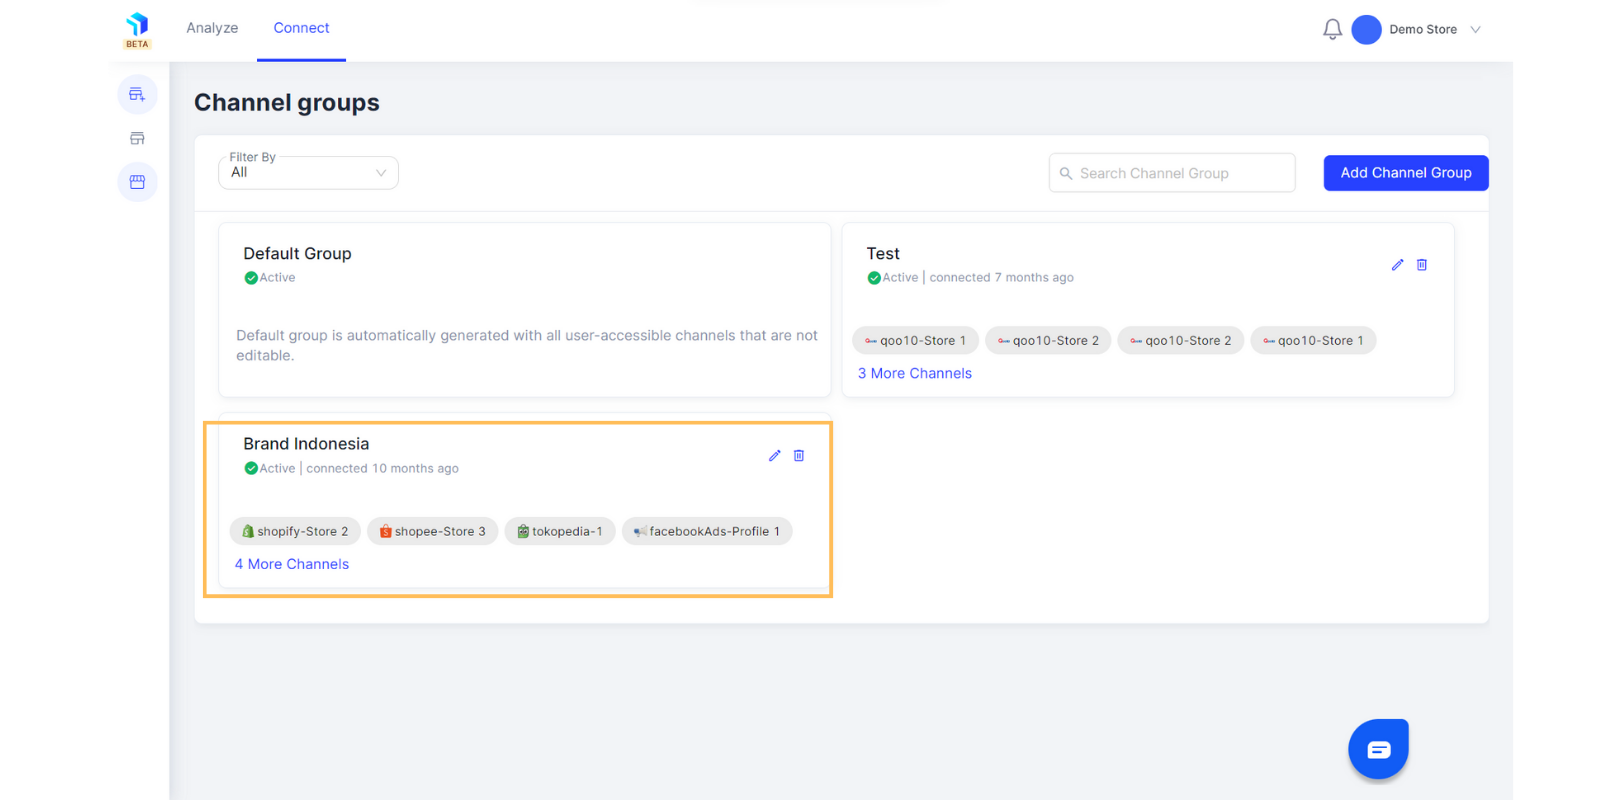
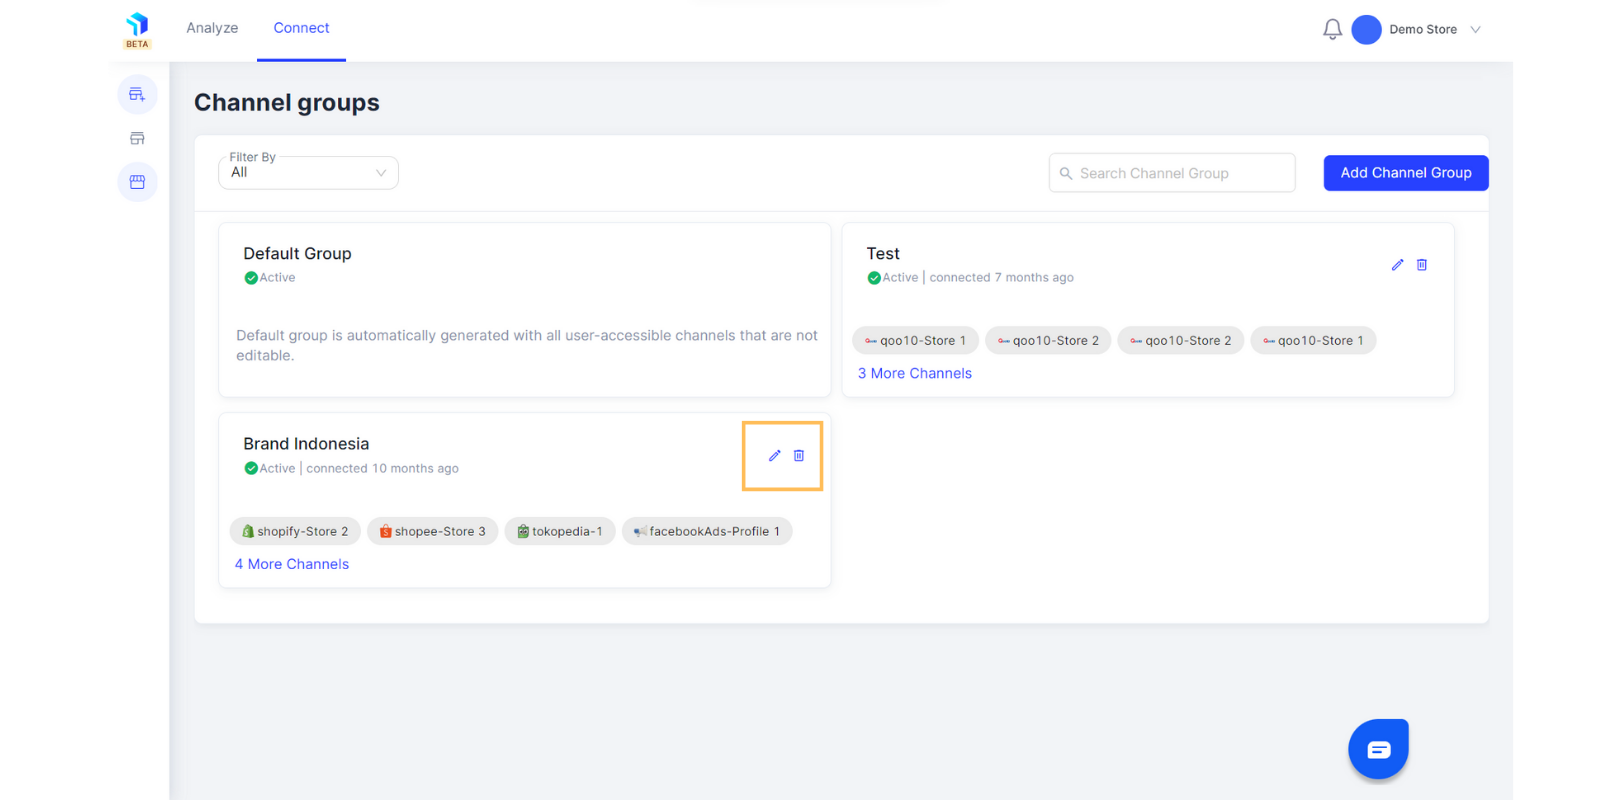
6. In case you still need to add more channels to one group or remove a few from a group you can just click on the edit icon on the Channel Group page.
Related Article(s):
Install Chrome Extension
eCommerce Dashboard Overview
Marketing Dashboard Overview
Marketing Deep Dive Overview
Business Deep Dive Overview
Where to view all the AI powered Insights